

( I am aware this is a bit of a jump from camera basics, this post was written back in 2015 but was moved to this blog when I created it. More tutorials covering the basics are on the way, I just wanted all the technical and tutorials to live on this blog and my work for clients on my main blog - Rick )
Ahhh the white background, it has been around for years and you will see it every day be that on TV, in magazines or other print material. It’s stood the test of time and will still be around when the fad of 50 texture layers has long past. Why?
- It's Clean and Simple.
- It's a classic.
- It Works for a lot of different subjects/jobs.
- The shot is about the subject and not the background.
- Can give you options in post (cut outs, negative space for logo or graphics).
- You will see it most days in fashion, TV and video.
Some people call it boring and over used, I call BS and say that the fake Photochop backgrounds and textures are over used (often badly) and they will disappear. You know what will always be around?... yup a clean simple background be that white, grey, black or another colour.
White background or white seamless (what this post is about) has been around for years and if it was good enough for the likes of Richard Avedon, Hurb Ritts and David Bailey it is good enough for anyone.
You can use a roll of white seamless paper in many ways, it does not have to be a lit (lighting the background) white seamless shot. It can be taken any shade of white, grey and even to black, this post will concentrate on the lit white seamless set-up from my own experience and in the spaces I have shot it in including my newly opened studio.
Just a heads up you will be filling that swear jar when you first get in to this and especially if you are trying to pull this off in a small space with white walls.
The Space...
Let’s see how can I put this?.. the more space you have the easier your life is going to be shooting full length white seamless.
It would be all kinds of awesome to have a studio space with 15 ft ceilings, 30ft by 50ft but the reality is we don’t. If you are going to try this in your 10 by 10ft spare room with 9ft ceilings and white walls, best of British to you. You will hate it.
You need space to work.
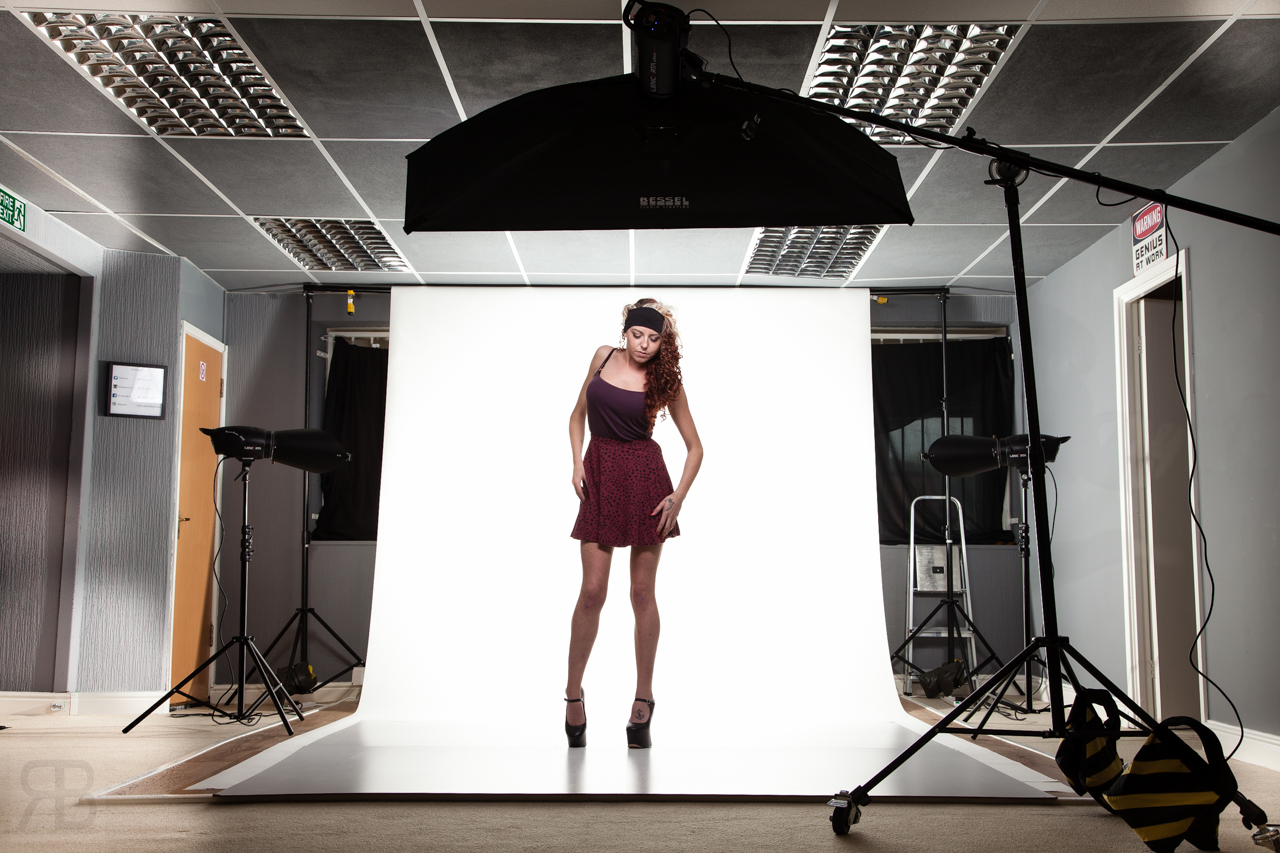
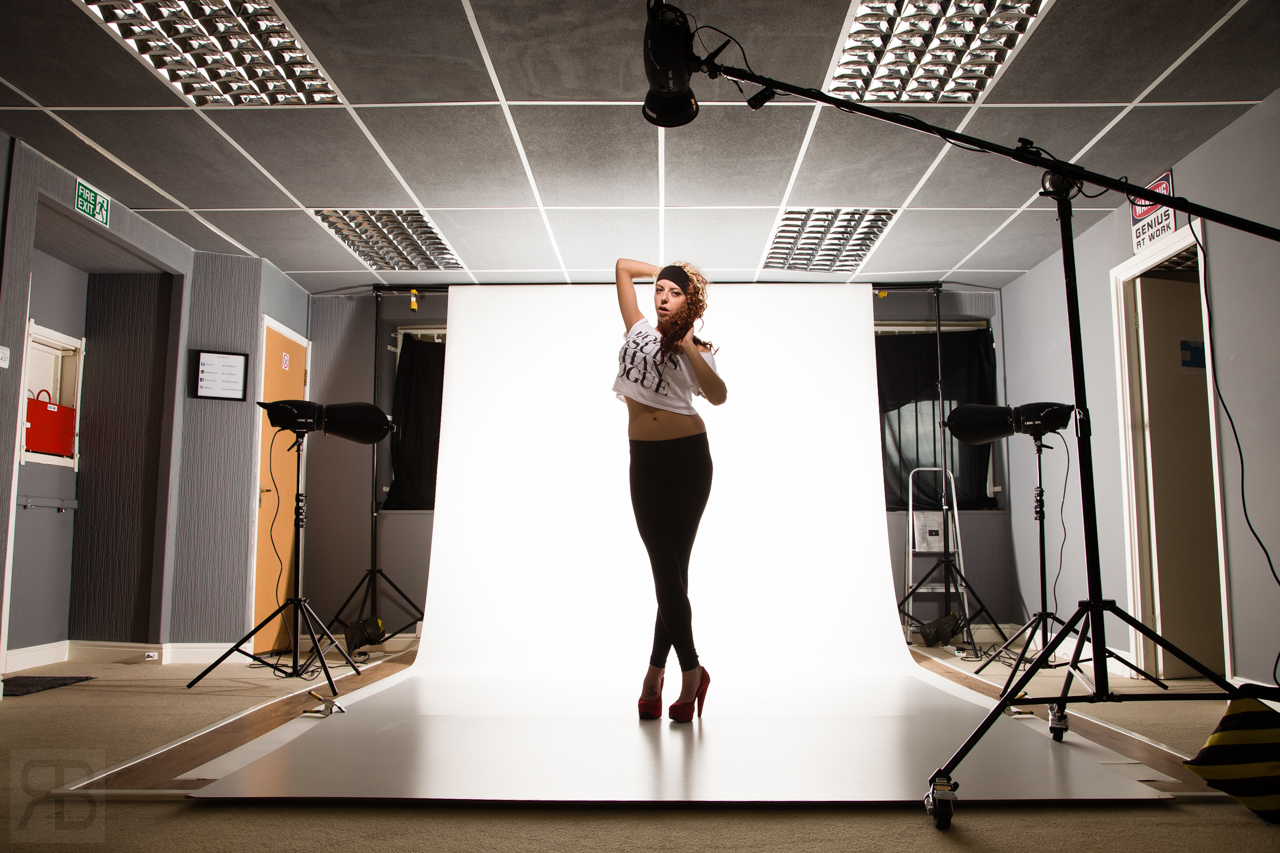
That background is going to light up and become a huge light source that sends light everywhere. If you look at this image below you can see the walls and PITA ceiling are painted grey, that’s not because of any kind of Feng Shui requirement that’s all about controlling light.
That grey paint on the walls/ceiling affords me more control than white or any other colour paint would and it also means I don’t have to bring in 8ft x 4ft V flats (that would not fit anyway) to control the light.
Note that I also make sure the office door is open when setting up the white seamless set otherwise it will become a white reflector.
My studio is 38ft long which is great 15ft wide (would like a little wider) and this is the killer 8ft high thanks to that dam false ceiling, I could rip that thing down or raise it but I don’t want to commit to that just yet. Am I totally happy with the space right now.. nope but I can make it work. I would say that if my ceiling height was 12-15 ft I would be good.
You need space to place the background lights so they cover both sides of the background but don't hit your subject and space enough to get your subject ideally 10-12ft away from the background. I typically place my subject 8ft away from the background because I am dealing with that limiting ceiling height.
Starting to see how that back bedroom is going to give you problems yet?
The Gear...
Ok so you will need some gear, some may say a lot of gear to pull this off. But you can make you own mind up on that, what you need are 3 lights not 2 but 3 minimum. You can shoot a white background portrait with 2 lights but you are not making full length white seamless happen with 2.
One light for the subject and 2 for the background. If you look at any BTS shots of large studio production with a raised floor, large cyc wall and v flats you will sometimes even see 4 lights on the background with reflective umbrellas on then another 1-3 lights for the subject.. this thing can scale up.
I have tried to light the background with 2 reflective umbrellas but I just don't have the power out of my background lights to pull it off. The 200ws heads would need be swapped for 600ws ones and I might still need an ISO jump.
The Background...
You will need a background and that is most likely going to be a paper roll 9ft wide and about 36 ft long (2.72x11m) this is the smallest full size roll you will get, they do longer rolls but they are no good for my space as I have that limited ceiling height to deal with.
You can get wall brackets, fancy background stands/systems with chains or motors or you can just get a simple £100 background set with 2 * 13ft stands and a 12ft long sectioned bar to hold the paper roll. I already had the simple background set so that's what I use, however it's on the list to change this at some point with a chain or motor system but that's not a priority even though rolling up a seamless with no chains is a pain in the wrists.
You will need to get some sand bags and get them filled with gravel so you can weigh the background stands down, grab a few and fill them as you will want some to place on your boom stand or key light stand. Trust me it's not nice watching a light stand fall over with a head and modifier on.
I also use A clamps to hold the background roll and stop it from rolling down when in use, they can also be used to hold the white faced hard board in place when shingled over.
If you are in the UK and want a good place to order paper rolls from try http://www.photography-backgrounds.co.uk/
I have had nothing but great service from them.
The Camera & Lens...
Any...ANY DSLR or mirror-less camera with a hot shoe and manual exposure will do, Canon, Nikon, Sony, whatever.. You don’t want to be shooting studio work with any semi-automatic mode or a point and shoot because you want total control, this is also why I don't run TTL in the studio.
Also whatever you do don’t shoot in a controlled studio environment on AWB (Auto White Balance), just set flash white balance and be done with it, the amount of times I come across people shooting AWB in studio baffles me. Ok moving on…
The lens will need to be 70mm up for a full frame camera or 50mm up for an APS-C (crop) sensor camera. You need to be able to fill the frame with your subject to maintain all the resolution on them without going off the background. On a full frame camera in my studio with 8ft ceiling I am typically at 105-135mm but can also shoot with the 85 and pull it off.
As you go wider with your focal length you will start to expand perspective (actually by the distance change you have to make) and drag in more of the background and set-up, sometimes you want a wide shot like below to show the set. You can also shoot wider focal length for environmental portraits. I tend to do this in the studio for BTS or to reference lighting set-ups like below.
Let’s look at 2 images from my LGTL workshop.. The left image was shot 24mm and the right image 105mm. Bex was not moved I moved and changed focal length to compress the background. The light used was the crappy fluorescent available light in the studio, forgive me.
This was taken during my Let's Get This Lit Workshop.
You can see a huge difference in the above images not only in terms of what we can see in the frame but also the shape of Bex’s face. Now sure you could back off and shoot wider, that will help with the face shape but then you will have to crop the hell out of the image and waste resolution, plus you are being a lazy photographer. Shoot it right in camera.
I cover all of this and more in my workshop.
The Lights...
Speedlites/Hot shoe flash – You will be shooting at F4 and not F8 and may need a jump up in ISO to help. The reason for this is they don't have a whole lot of power in them once you modify them and have them set-up further away from the subject or background.
Or
Studio Strobes – These are the ideal as they typically have more power than a hot shoe flash and they are rated in watt-seconds instead of guide numbers.
If you buy cheap eBay lights that put out 100-150 watt seconds you are wasting money, you want power. Personally I would look to start with 300ws lights, sure you can do it with less but you move to studio lights for power in most cases.
The lights I have are 1 Lencarta 600ws head that I own and 4 Lencarta 200ws heads on long term loan. The 200ws heads are the weak link in this set but again I make it work. You can find out more about my considerations regarding studio lights here.
When I can I will be adding a couple of 300ws heads to the kit, the reason is the 200 heads are a version 1 and tend to be a little inconsistent when using ½ to full power which is where they tend to live when shooting white seamless.
My default settings/camera and lens for white seamless are as follows.
Canon 5D2
Canon 24-105 F4L typically at 85-105mm
ISO 160 - to help those background lights a little and to keep them around the ½ power mark.
1/125th sync speed.
F8 – this kind of f-stop needs power and to shoot this with speedlites would mean a jump to ISO 640-800 which starts to look a little noisy. Whilst I am not afraid of using higher ISO I do prefer to keep it lower in studio if I have the available power.
Please note these settings are for my set-up and are not THE settings for shooting white seamless.
Why F8? We are on a 255 white background nothing to see here (move along) so shooting a shallow depth of field is of no benefit. Also shooting at F8 gives wiggle room depth of field wise and will cover individual portraits and groups.
The Modifiers...
For the background you can use bare speedlites with no modifiers apart from some gaff tape to act as a barn-door/flag so light doesn't hit your subject. If you are going for a clean as possible white seamless you don’t want the background lights hitting your subject.
To prevent the background lights hitting your subject with studio lights you can use barn-doors, background reflectors or you can use cutters/vflats. The latter works real well but they take up space. Currently I am running with Background reflectors mostly because that’s all I have at the moment, I do have one barn-door and want to pick another up to see it gives me better control than the background lights when it comes to keeping those lights off the subject.
I may build some 7x4ft cutters to try and run a comparison later.
Don’t use bare bulb with a studio strobe or you will end up losing a ton of power and light from the background lights will hit your subject. You can see the background reflector and barn doors in the image below.
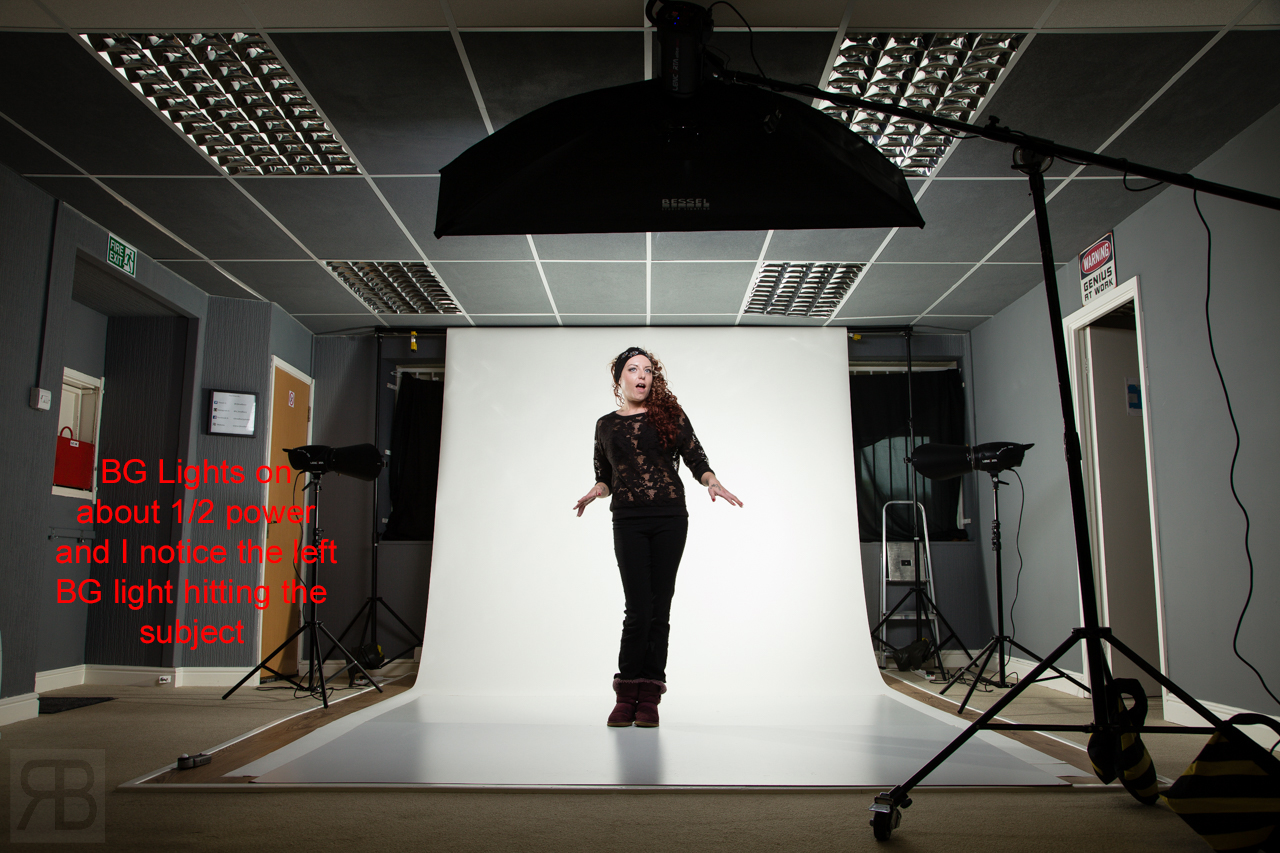
In this image you can see the camera left BG light is hitting Rosemary, this is because the light is turned too much towards camera position. #mybad
For the key light you can use any modifier you have… anything. It will depend on the look you want.
Softbox.
Strip Box.
Umbrella.
Grid.
Beauty Dish.
Octa.
Anything.
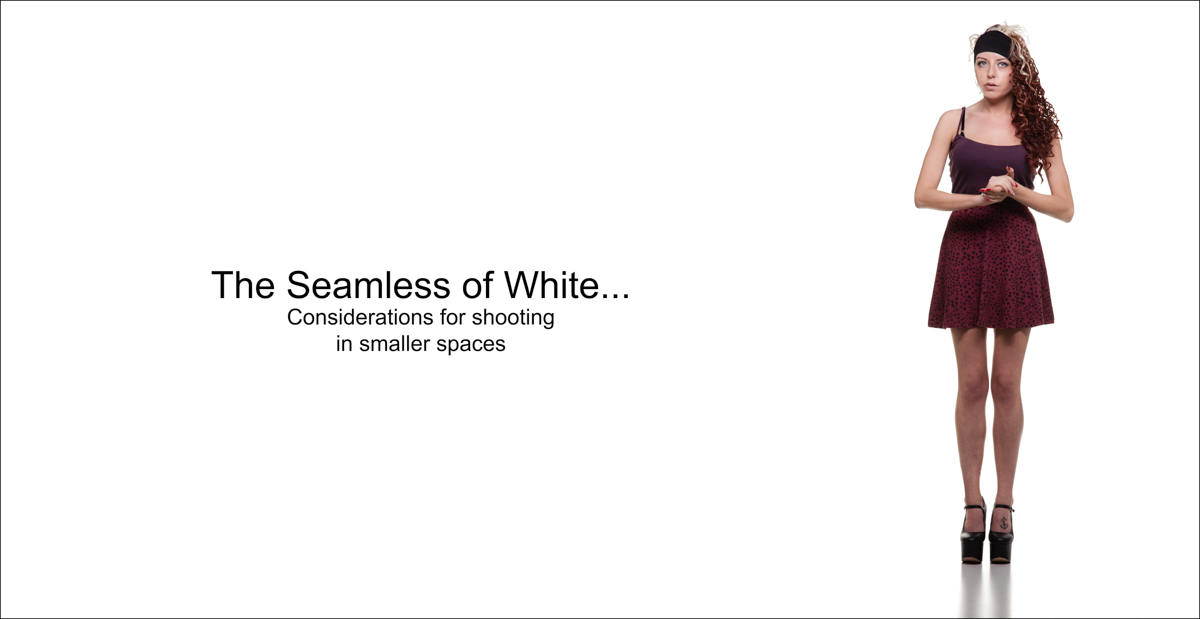
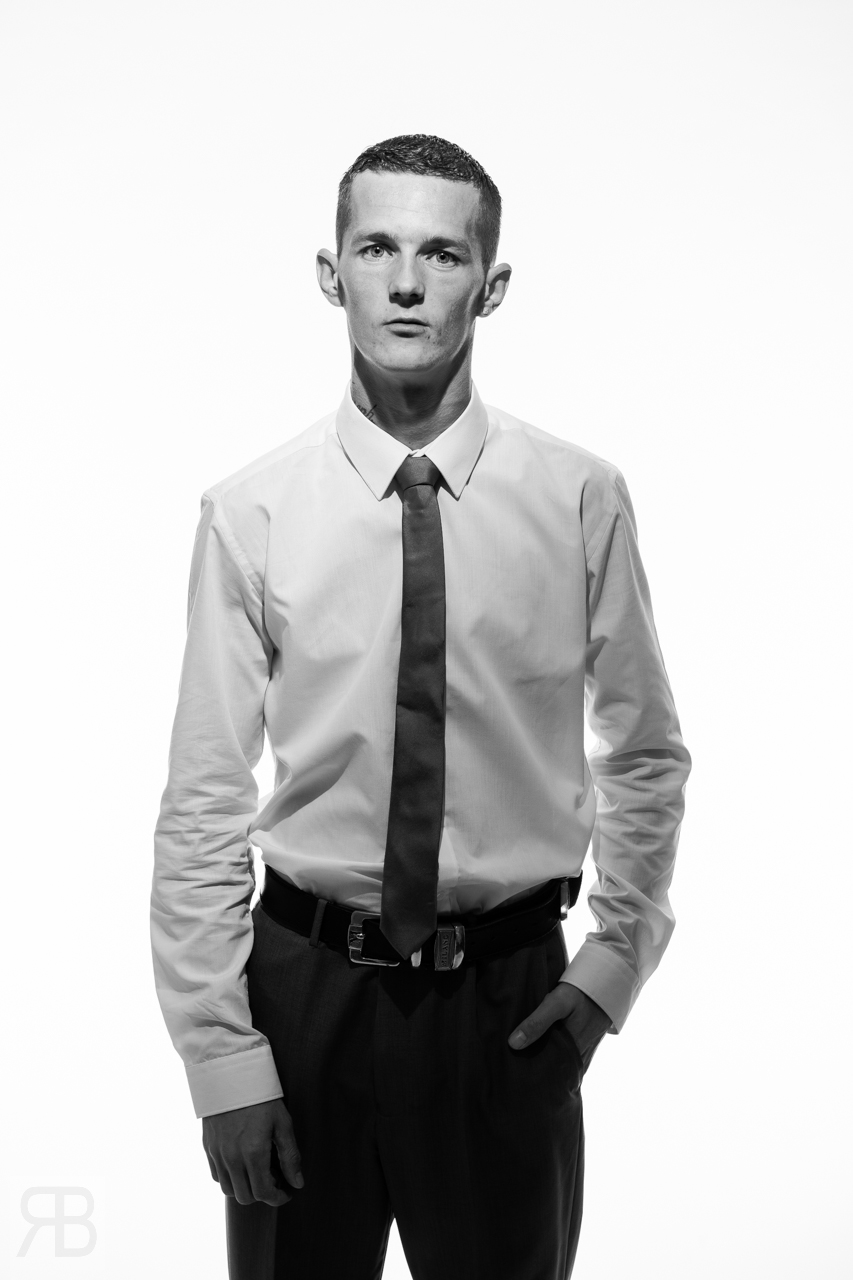
In the title image for this blog post I used a strip box in paramount (over camera/subject) position, otherwise known as butterfly lighting. I really like this light position but I have 8ft ceilings so this limits me to the strip box, bare strobe or a strobe with a grid because I don’t have the ceiling height at the moment to use anything larger.
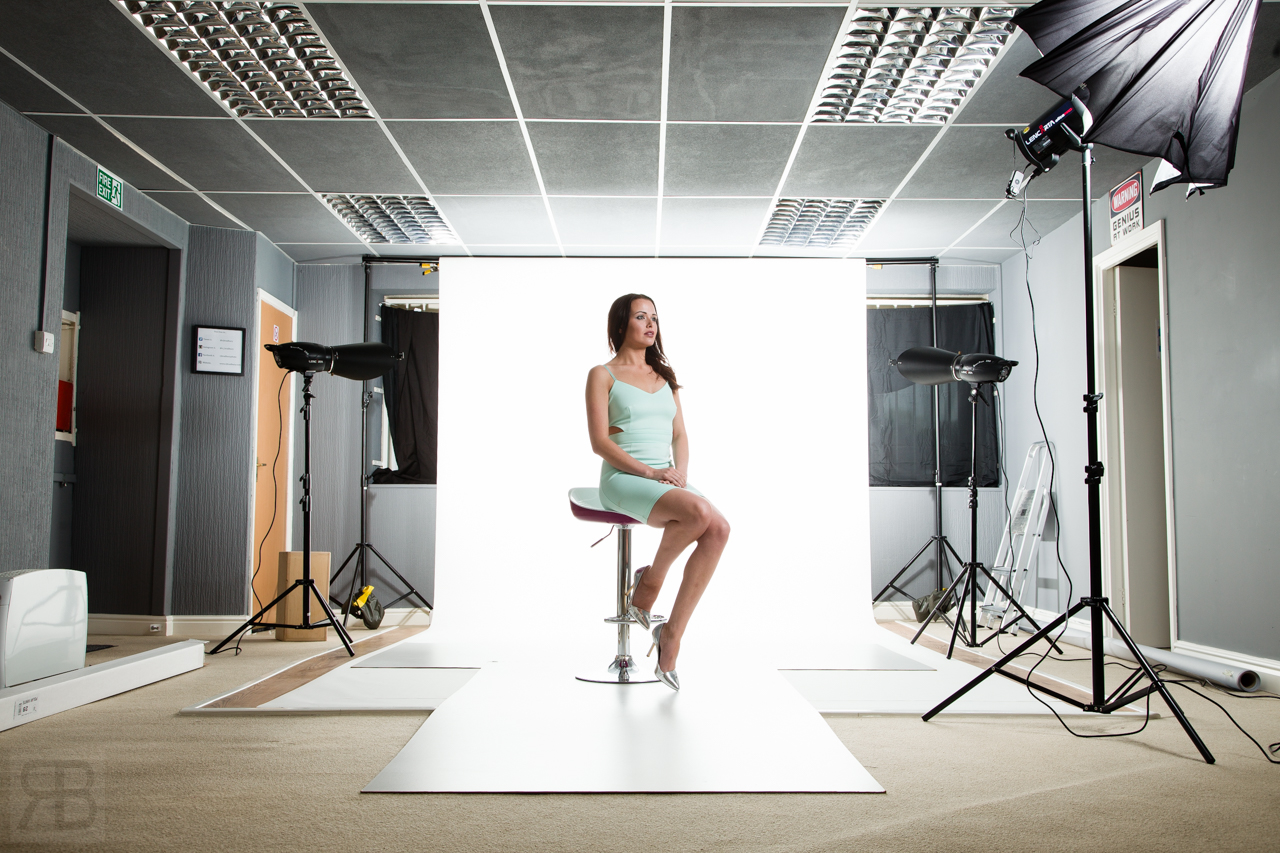
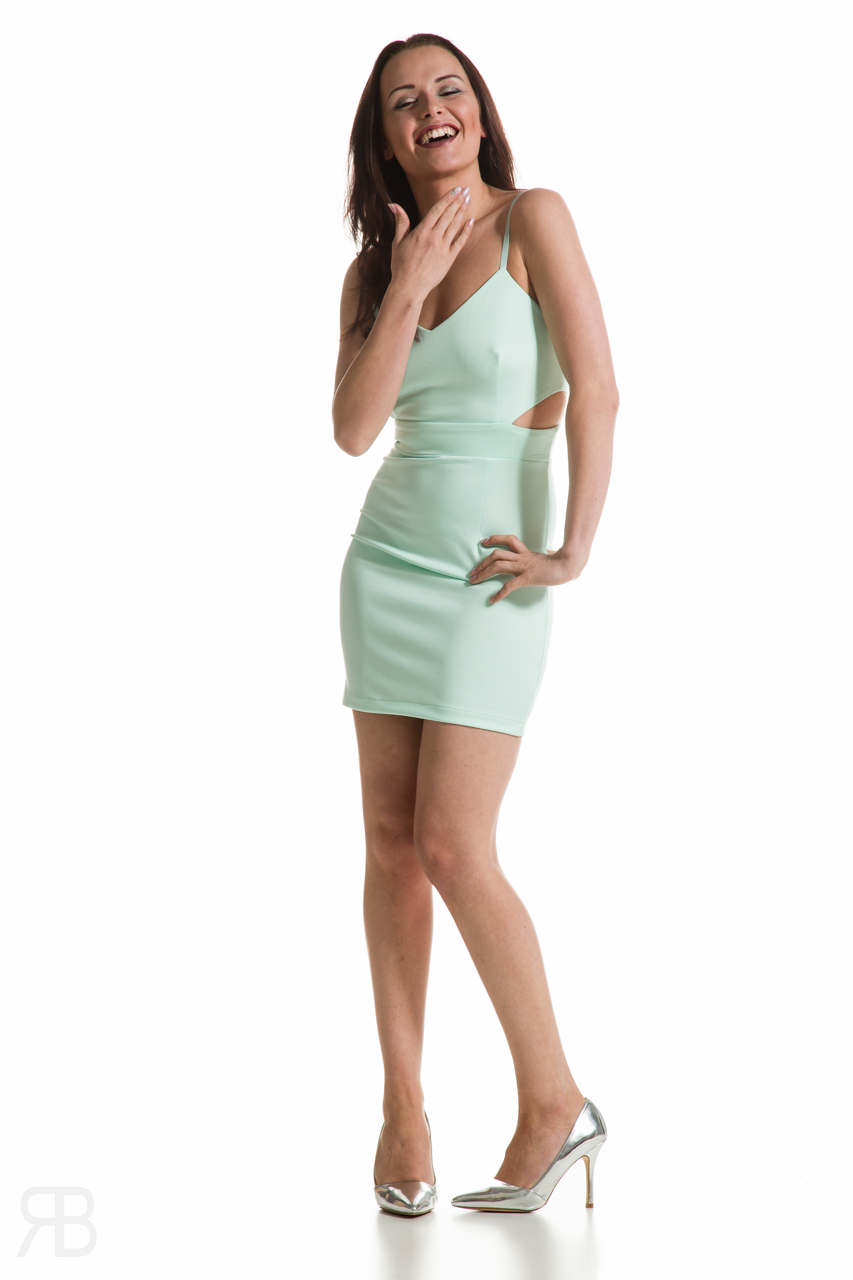
Below are a few images showing different modifiers used for the key/main light. You will see the set-up shot first then the final image. This will show the light placement/position.
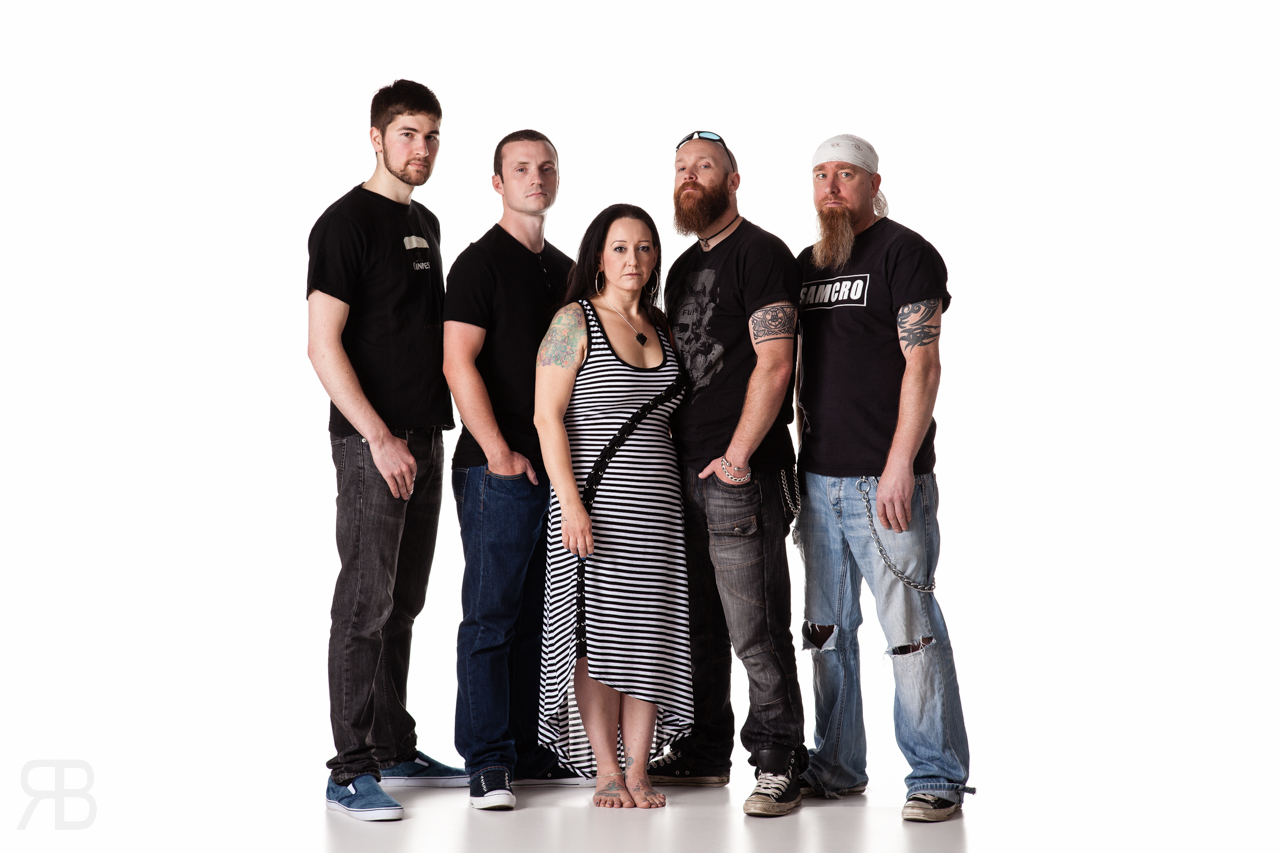
Band Shot (Flagrant Angel) - Was lit with a Westcott 7ft Parabolic umbrella with diffusion cover on positioned camera/set left. Please note the background was extended in post which is easy to do if you keep everyone in the white. Also note I have since painted another row of tiles grey.
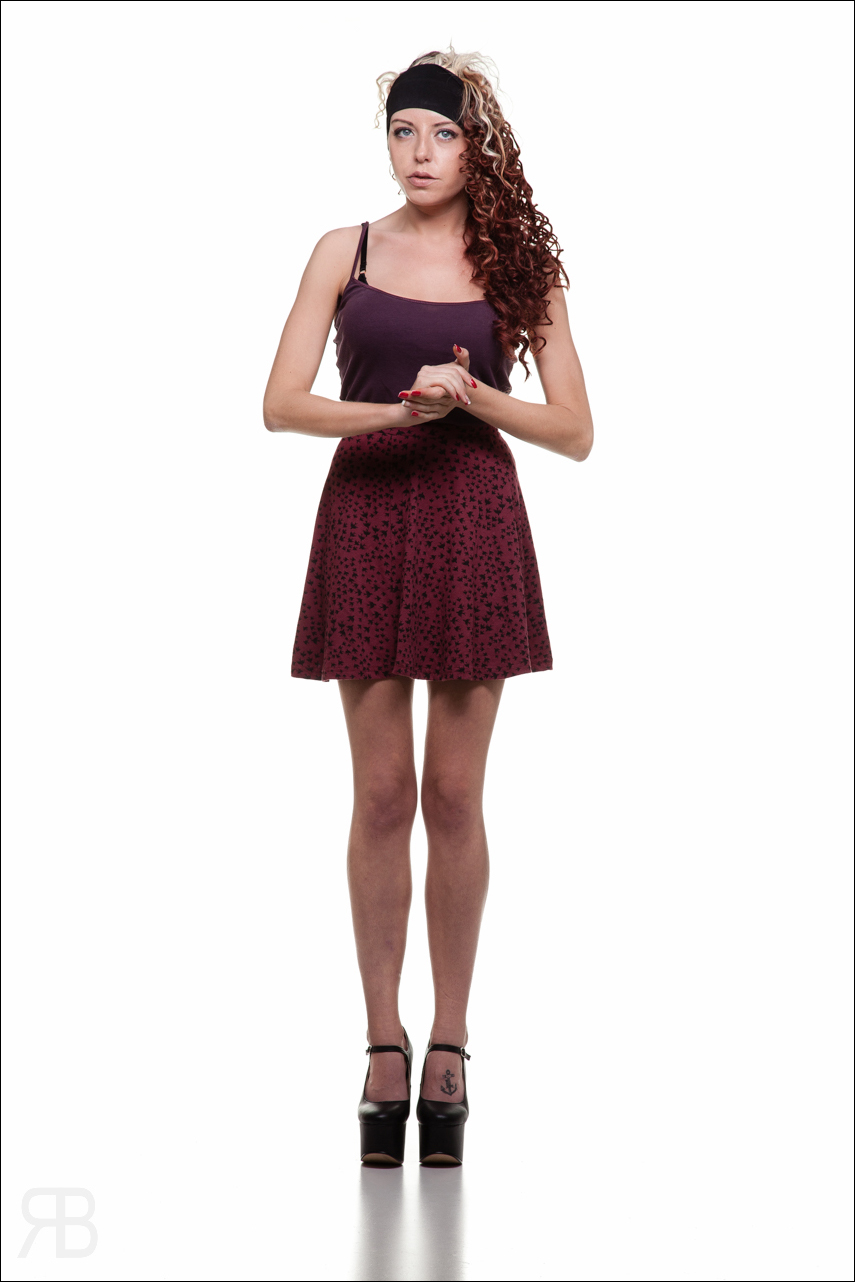
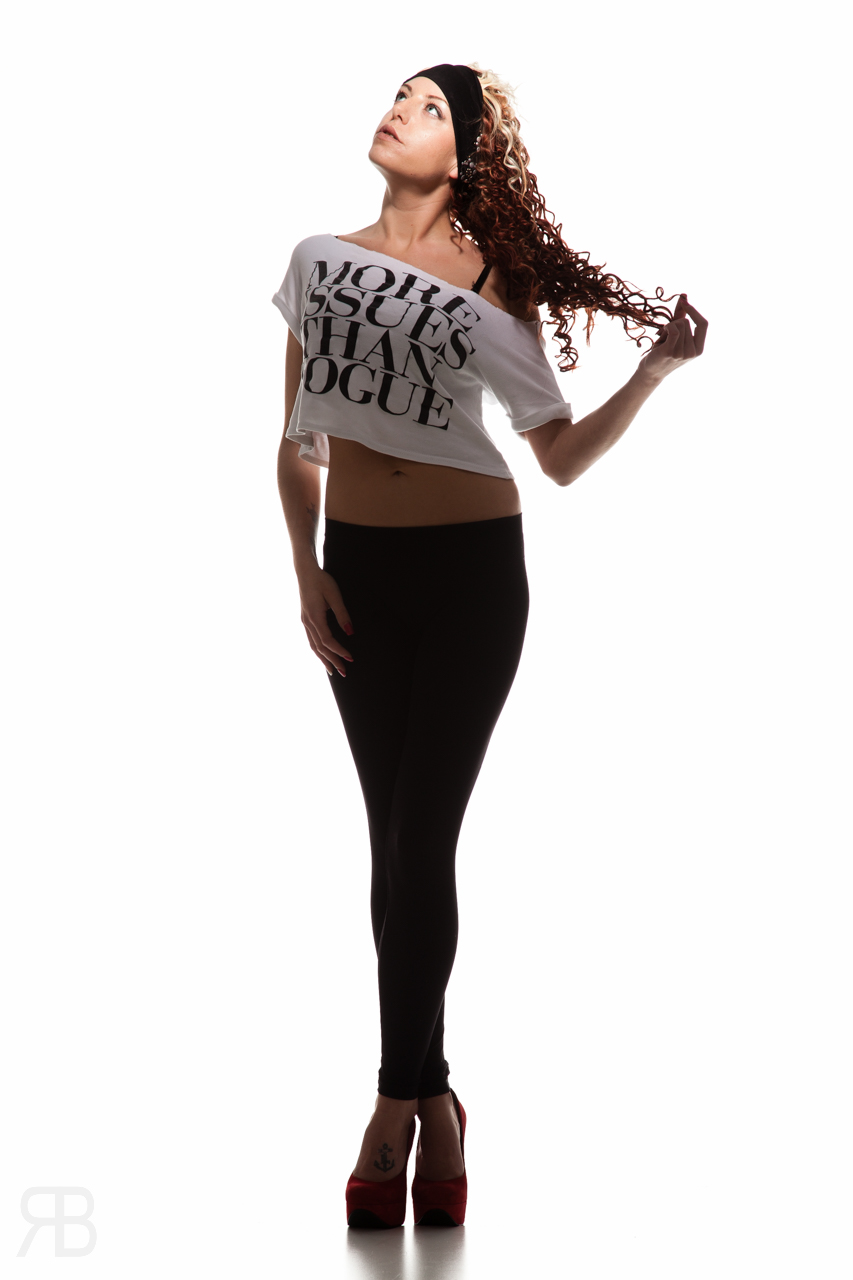
Rosemary 1 (Colour) - Was lit with the strip box in paramount (over camera/set position). Notice the fall off on the legs.
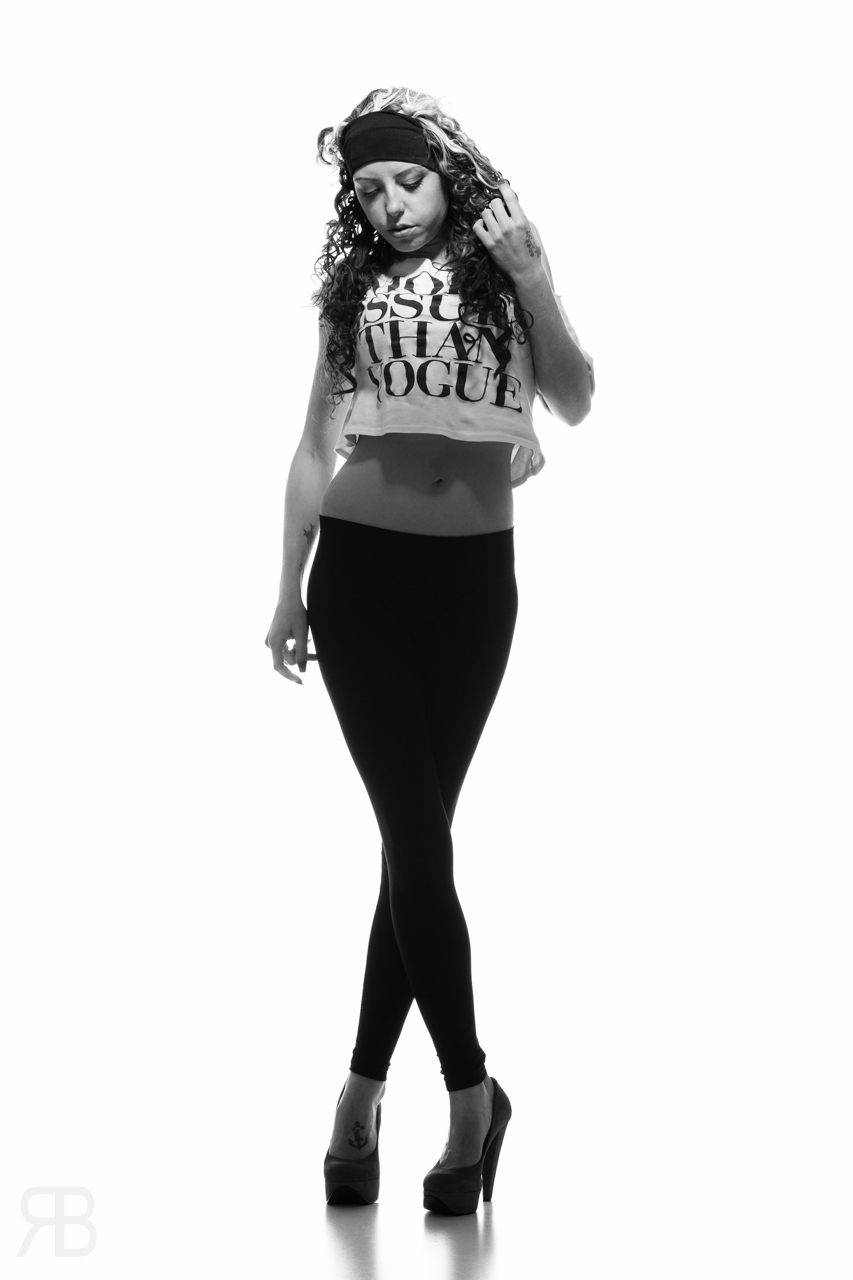
Rosemary 2 (B&W) - Was lit with a 20 degree grid spot. OMG Grids.
Dee - Westcott 60" convertible umbrella in poor mans soft-box configuration camera right.


A nice to have (I considerate a must though) are 2 sheets of 8x4 3mm thick white face hardboard, It also goes by the name of tile board and is what gives the grounding reflection shown below. The great thing about this stuff is it’s cheap and should last 6 plus months unless you abuse it. Each sheet is £8-9 but expect to pay some delivery on top from your local supplier. (Buy Local as it helps small business)
As can be seen in the above image the boards gives a grounding reflection, I prefer this as it means my subject is not floating in white.
You don't have to do this extra step but it is worth it. You will have to shoot from a lower position to get the reflections and to be frank if you are shooting full length portraits you will want to take a knee anyway, think camera perspective.
The boards will eventually get a little tired and worn so for me once it gets to the point where the edges are starting to come apart and I am having to spend more time fixing the marks on the boards in post I replace them.
If you are only photographing one person you can get away with just one board but the floor on the sides of the frame will need a little more work in post, again it's a quick fix in Lightroom or Photoshop. You will most likely need to clean the floor up in post unless you have new boards and the ideal sized space but they help get as close as possible out of camera.
Let's Talk Distance & Light Placement...
The thing is I can’t tell you the exact distance to place lights as each environment is going to be different and the background light modifiers could be different. People have lit the background with reflective umbrellas, soft-boxes, Standard reflectors or Background reflectors. Each to own.
One thing to note when using the modelling light to judge light placement, that bulb sticks out further than the flash tube so unless you stick an umbrella or soft-box in front of those bulbs the light you see will differ with modelling lights compared to the flash tube, they do help get you close though.
If you are using a modifier that diffuses or softens the light you will need more power as they typically kill a stop or 2 of light output, personally I would use standard reflectors & barn doors or background reflectors as they will do two things.
1. Give you more out of your background lights which can help if they are lower powered units.
2. Not tie up modifiers you might want to use for a key or fill light.
I will typically place my subject 8ft away from the background (in my space) but every so often if they are shorter in stature than the average person I will bring them further away, don’t forget I have that 8ft ceiling to contend with.
The background lights with the background reflectors can be worked closer to the background than when using a standard reflector as they have a wider light pattern spread, they are about 4-5 ft away to get good coverage on the background.
You want the background lights to do 3 things.
1. Cover the background evenly – It’s best to cover the left side with the left light and the right with well the right. You can overlap the light in the centre of the background a little.
2. They need to cover the back edge of the back board otherwise it will show up in the photo. Remember that background is going to go 255 white (nuclear).
3. Not hit your subject.
To help speed the set-up of this up in my studio I have marked the positions of the light stands for the background lights with tape.
The key light can be positioned anywhere you like even if the light stand or modifier shows up in the shot, after all its going to be against a white background so anything like that will be easy to remove in post. Yeah yeah fix it in camera.. Sometimes you want that modifier close for that look it gives and some compromises are going to have to be made.
Let’s lay that out visually with a some images.
The background paper can be any white roll but I recommend giving it a 3ft radius on the curve that comes down to the floor, that way you will have no hard lines or edges/folds as the paper meets the floor. Also you will need a hard floor not carpet as well, this is why the laminate floor has been put down.
You can see in the images of the set-up that the left and right edges can go a light darker, this still happens when you fire the flashes especially with a group of people on the set.
What this means is that you will most likely need to clean up some areas of the floor in post-production, also if the boards have any marks on they might show up also and will need to be cloned out. The larger space you have the easier it is to get this cleaner out of camera.
Exposure...
As I mentioned earlier in this post this will depend on the lights you own, speedlites have less power than studio lights and not all studio lights are equal.
With speedlites the exposure will be 1/160th (or camera sync speed), F4, ISO 100 (ish). if you want more F-Stop then you can up the ISO if your lights are on full power already.
Studio strobes give you power to play with and will allow you to shoot at F8-F11 at base ISO 100-200, however you will have to slow your shutter speed to maintain sync this typically means 1/125th. I am shooting at F8 to give a good amount of depth of field and on white seamless I have zero interest in bokeh or shallow depth of field because the background is nothing but pure white, it also gives room for subject movement and still holds focus.
In my space I shoot at F8 ISO160 1/125th. The jump in ISO is just to help out those lower powered background lights and allows me to keep them at around 1/2 power.
The power setting for your lights is not something I can cover as I don't know your lights, modifiers or space you are working in, that's your homework to figure that stuff out. What I can cover is the exposure relationship between your key light and the background. We will run through this with the set-up and typical settings I use but remember your mileage may vary.
So ISO 160 1/125th. Lights at what ever power needed to hit the target F-Stops on the key light and background.
If my key light is at F8 then the background needs to be 1.5-2 stops brighter to blow that paper to pure white, in F-stop terms that’s F11.5 to F16. A light meter can help with this process but you don’t have to go buy one. I do recommend making sure your cameras screen is not set to auto brightness as it can affect how you judge your exposure unless you are checking your histogram.
You may have read that 1.5 – 2 stops is too much and it should only be 1 stop, thing is if you want pure white you won’t get it with a 1 stop difference that said it’s an option it you like that look on the background but just don't expect the boards to snap white.
On your camera make sure the highlight warning is turned on as it will visually show you when the background has blown out, gone to white, off to visit highlight heaven.
When building your exposure I recommend starting with your key light first, get that dialled in and set in the position you want and then leave it be.
We then need to build that background exposure.
I light my background to 1.5-2 stops more light than the key light so it snaps to white as I want that 255 pure white and clean look.
One thing to keep in mind is that the background is about to become a big light source and the more exposure you give it the more it can start to wrap back around your subject and cause loss of contrast and lens flare. This can also be a problem if you are having to place your subject close to the background due to space restrictions.
You can see in the above image that because the background exposure is a little too bright or I have my subject so close to it the light is starting to wrap around the arms, you have to watch out for this but it may not be totally avoidable if you are working in a smaller space.
Speaking about contrast some lenses do better at dealing with a lit to white background than others, for example my Canon EF 50mm F1.8 II fails at this where my Canon 85 F1.8 does ok.
The best lens in my bag for holding contrast is the Canon 24-105 F4L.. I suppose it has a red ring for a reason right.
Another thing that can happen is that highlights can appear on the sides of faces or chins sometimes, especially with people that have short hair. Sometimes this will bug me but most of the time I am ok with it. You will find it is worse when you have them turned towards the background more but if you get a bright highlight you have either made a mistake on exposure or your background lights are hitting your subject.
Ok let’s build that background exposure, remember we are looking to get it to somewhere between F11.5 or F16. When I meter the background I will get 11.5 –F13 on the edges and F14 ish in the centre where both background lights are hitting the background.
In the next set of images we will start with the key light and then start to bring those background lights up gradually until we get the background to pure white. The exposure on the key light and subject won't change but the contrast in the image will change when that background lights up.
Each image will have the rough background light power value on for the lights I use, the reason I say rough is that the dial is not accurate and it’s hard to judge the small increases on the back of those lights.

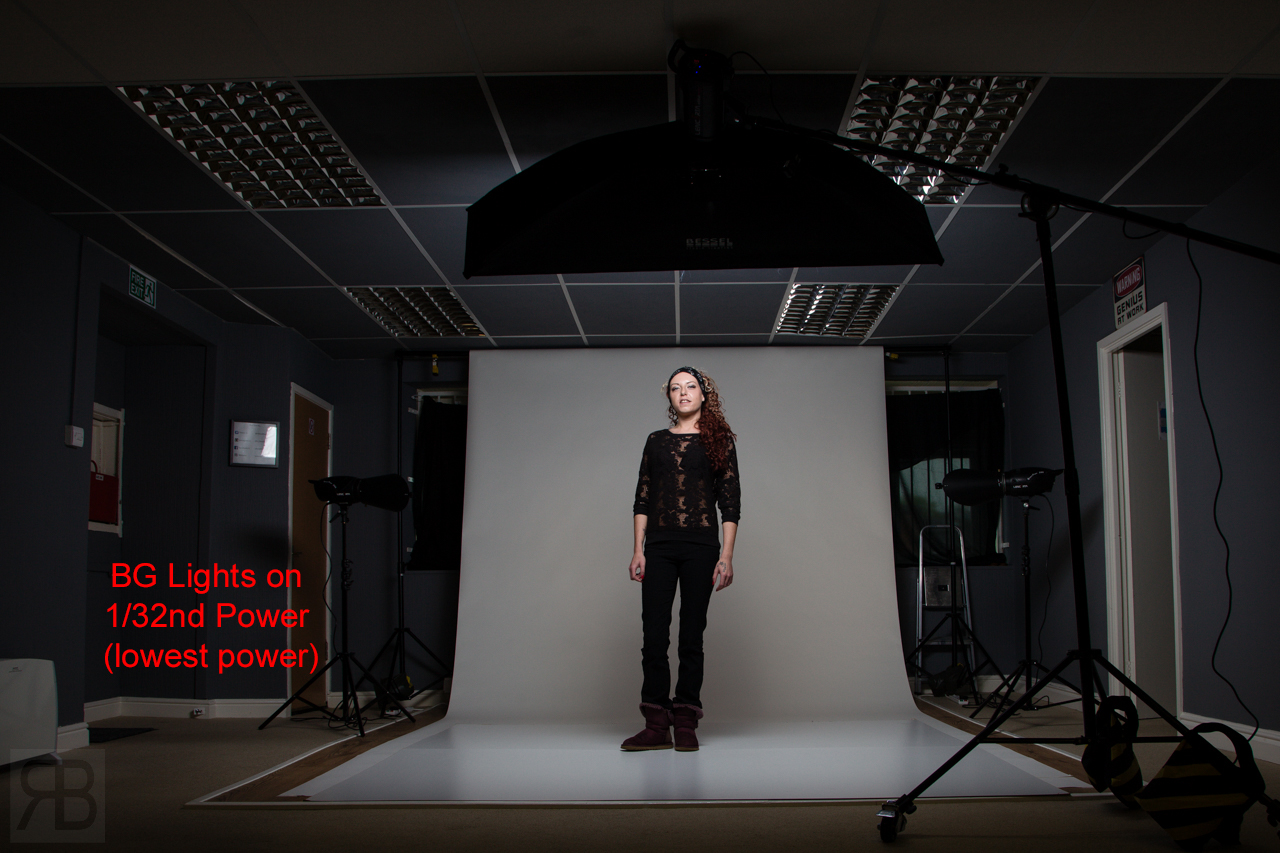
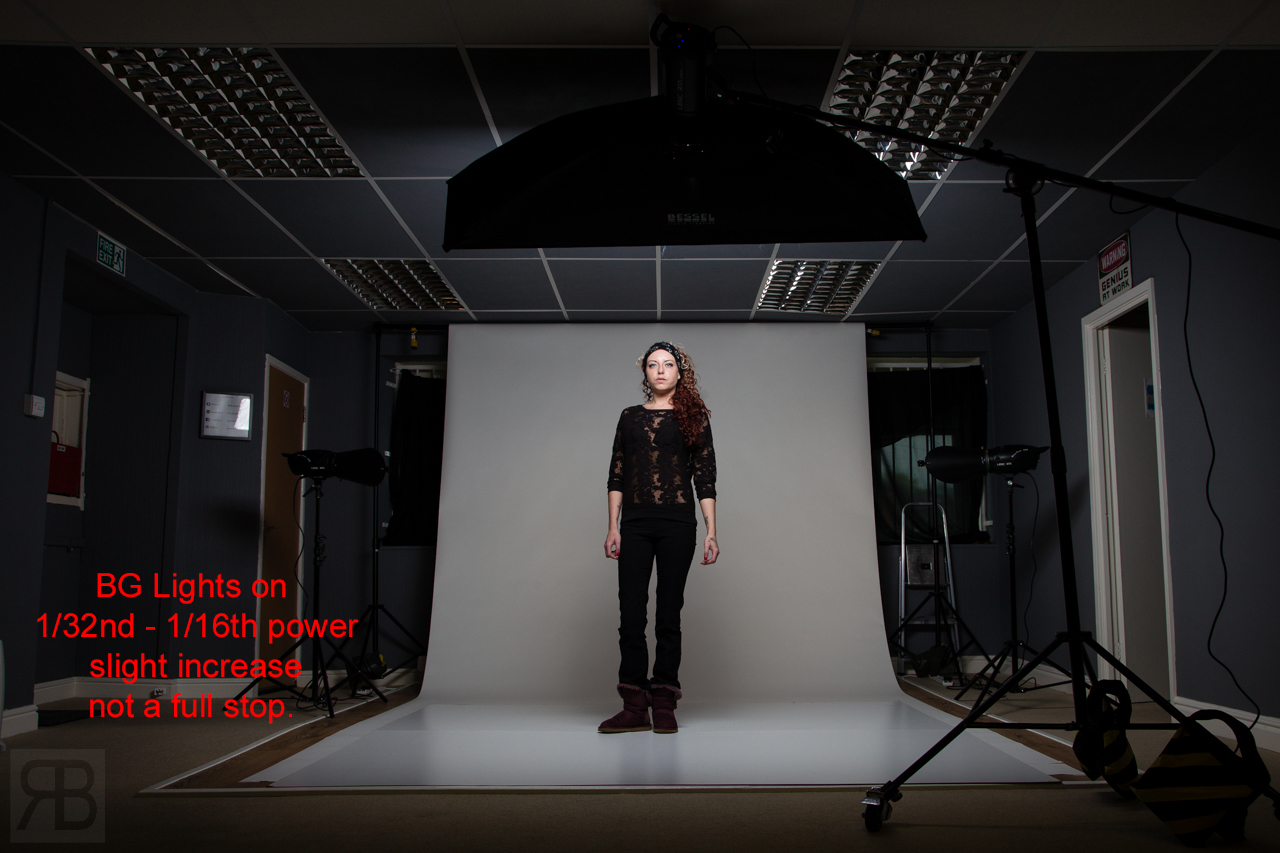

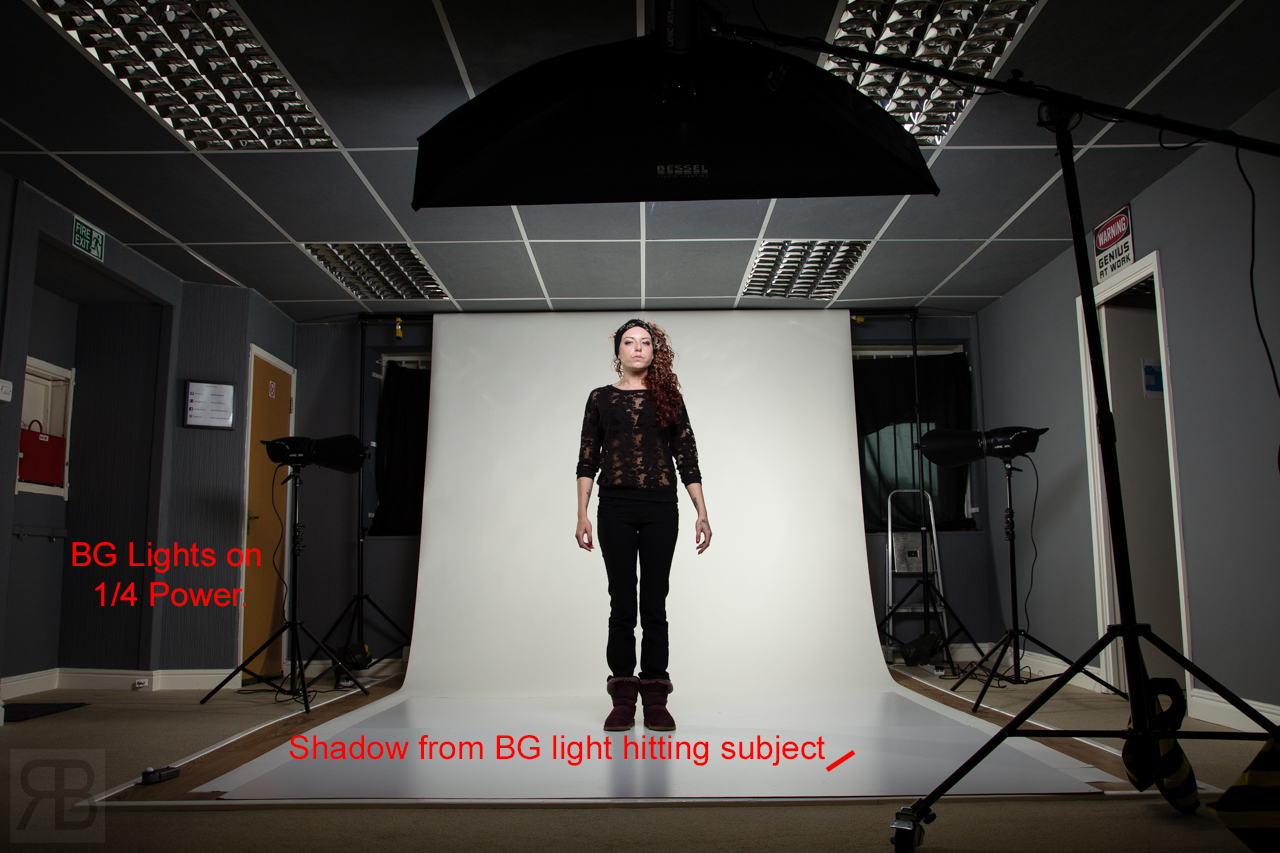
I take that background so it snaps to white whilst looking for clean separation subject to background and watching for the background lights hitting the subject.
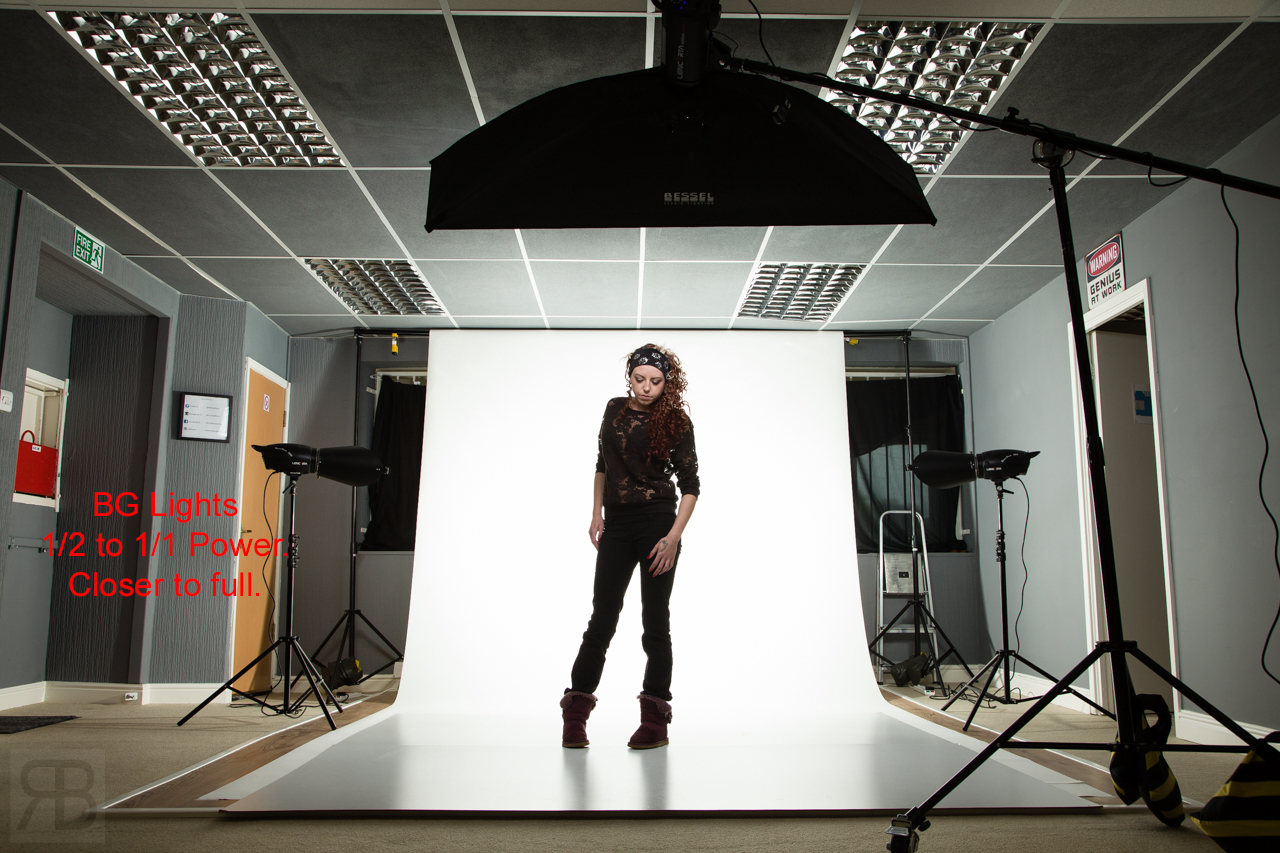
As you can see those 200ws background lights are near enough on full power, they are the weak link. You can hear them scream.
With them being an older generation light they start to become inconsistent when pushing ½ power or more (at least in my testing) I could increase the ISO to bring them down to nearer ¼ power but that key light is 600ws and it’s nearly on minimum power. What I need to do it replace those 200ws heads with 2 300’s or 600's and just keep one of the 200 heads for lower power key light duties where I want to shoot at F2.8-F4. All in good time.
I have a pretty good space bar that dam 8ft ceiling, if you want to try this in a smaller space then go for it. You will find it harder and will have to make compromises.
The thing to do is to try it in the space you have and see if you can pull it off, you might have to back the background light power off a bit and then fix the background in post.. That said how much is your time worth having to do that for EVERY shot.
Once you have this dialled in you can shoot without worrying about the light, exposure or gear and concentrate on the portrait and moments. Expect to have to make some compromises and do a little clean up on the floor and background if running with lower end gear that is not really consistent.
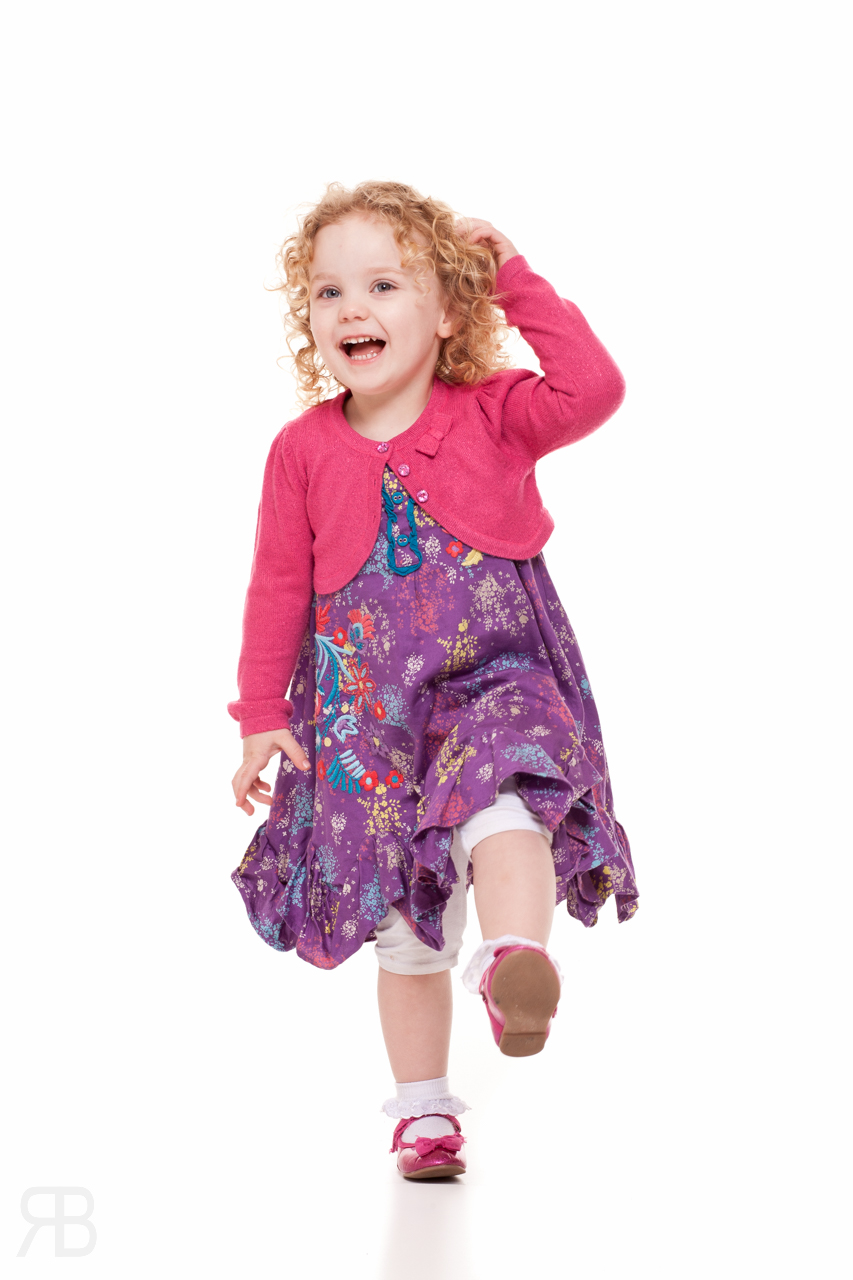
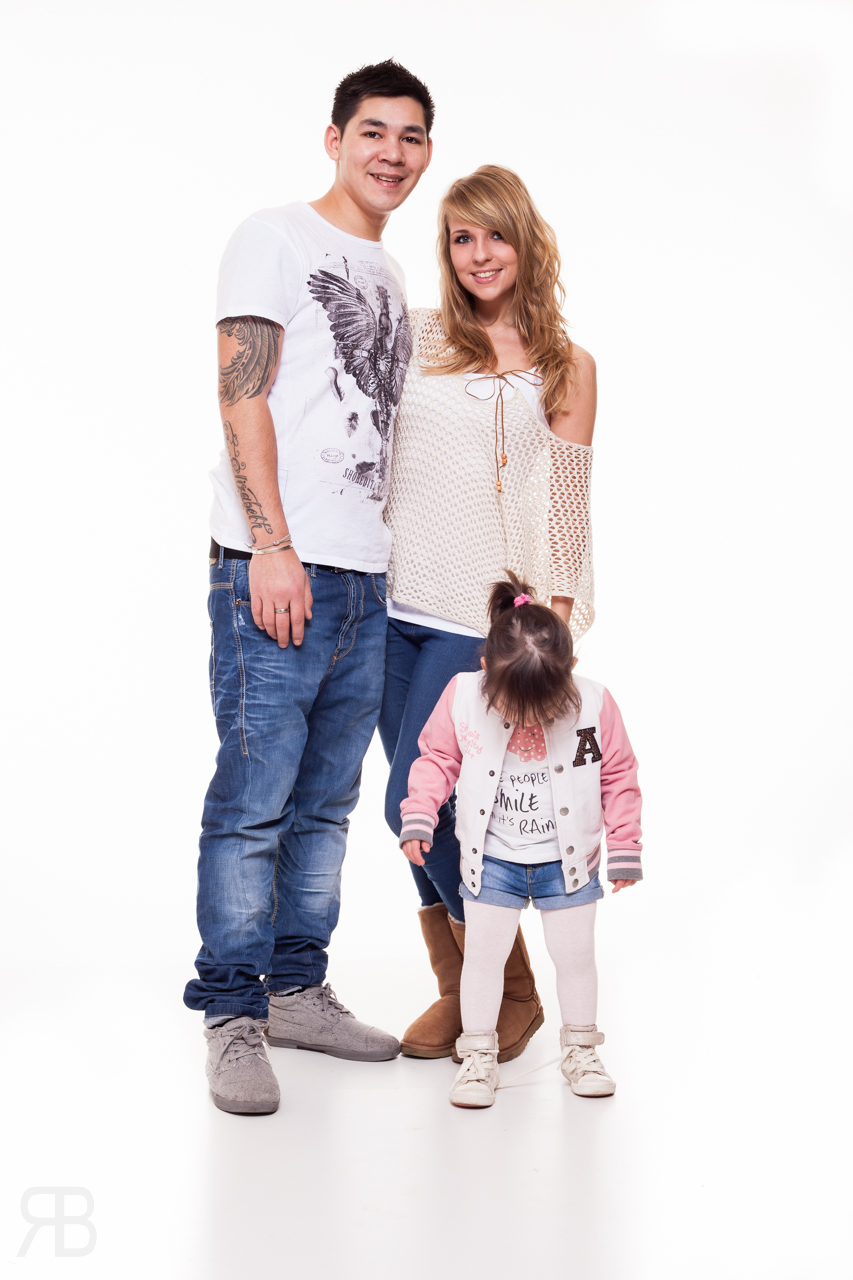
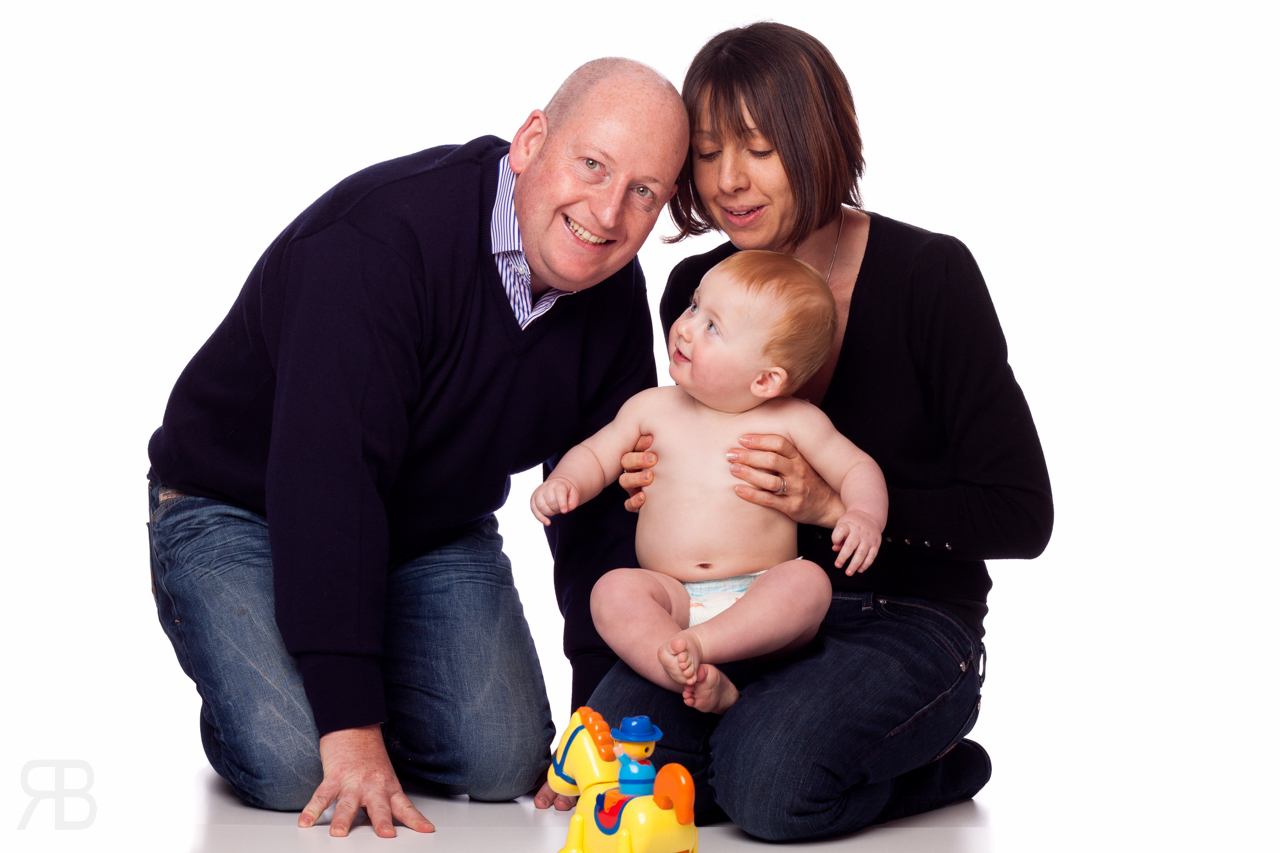
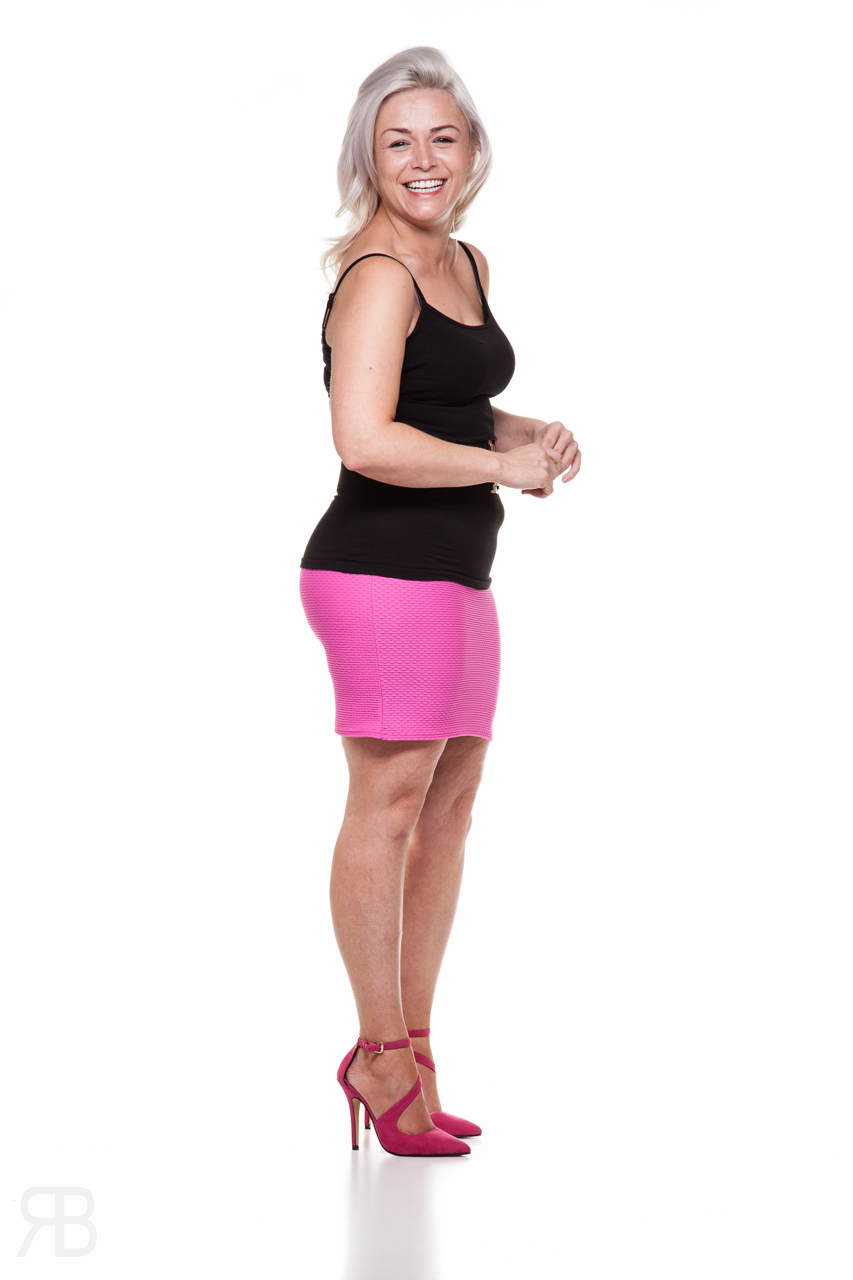
You can do more with a roll of white seamless paper but that’s for another post, for now I will leave you with some images shot on The Seamless of White.


Update [ Lens Tests ]
I mentioned during this post that some lenses fair better than others when shooting in to light or a lit up background and that's what we are going to look at now.
Please bare in mind I am testing my lenses to illustrate a point and I don't have access to every lens on the market, you are going to have to do some home work to get to know your glass.
The lenses I have and being tested here are...
Canon EF 24mm F2.8
Canon EF 35mm F2
Canon EF 50mm F1.8 II
Canon EF 85mm F1.8 USM
Canon EF 24-105 F4 L IS
Canon 70-200 F2.8 L IS << Sucks at this.
My glass is all older and not the latest but still works. I
I expect the newer versions or more expensive versions of these lenses would fair different due to new element technology and coatings.
First up I want to set the scene so you know what were are dealing with here. Setup wise we have...
2 Lights on the background (Lencarta 200ws Studio Mono Blocks) - The background lights are modified with 7" reflectors and barn doors. I also have a couple of flags on stand next to the background lights to cut any raw light off the subject that may come from a light or a gap in the barn door fitting.
1 Light for the key light (Lencarta 600ws Studio Mono Block) - This has a 43" Octa on of some random brand who's name escapes me right now. This light is setup on a Pixapro C-Stand.
I have those white boards on the floor to give a grounding reflection. That's it.
On to the lens tests.
Settings wise as mentioned earlier on in this blog post I am shooting with my Canon 5D Mark II at ISO 160, 1/125th, F8.
I kept the settings the same on the camera throughout the testing but I did crank the background lights 1 Stop for each lens to show how they handle that background when you get it wrong. Please note that you may need to make adjustments lens to lens, with mine I can leave mine set and nothing changes exposure wise that drastically lens to lens at this F stop.
The images were taken in to light room and reset. They only change applied is a lens profile, everything else is Out Of Camera. No colour or contrast changes, RAW files only and the white balance is set in camera via kelvin and a WB adjustment.
The Setup ..
When I meter this setup I work to make sure the light bouncing off that white paper hits the back of my subject at F8 and now more, I would like it to be less say F5.6 but I need more distance and ceiling height to make that happen. During these lens tests I crank the background lights to full power to push the lenses which means a meter reading F11 at the back of my subject which is way to much. The light stars to wrap around the edges of arms and clothes and I lose contrast.
Also a quick note - The mannequin does not have skin so it's naturally more reflective showing highlights that are a little more distinct than a real person.
Also the ideal world would be to have a little more ceiling height so I can get the subject further away from that background and the background lights a little further away for a better light spread. But that would mean raising the ceiling and buying 2 600ws heads. I could buy more powerful background lights and build some v flats to cover the lights.. I may do that so I can get a wider spread of light on the background. I have a pretty large space and have to make compromises here.
The Lens Tests
First up is the Canon 24mm F2.8 prime lens. This is an old lens design now at about 19 years and it's a great little lens. It's wide and fast at 24mm and F2.8 and works great. I do prefer the colour and contrast out of the Canon EF 24-105 F4L IS though but that's a F4 so not great for low light work.
This first shot is with a good exposure. Settings ISO 160, F8, 1/125th.
5D Mark II, 1/125th, ISO 160, F8. Background lights are at between 1/4 and 1/2 power. The dials on my 200ws BG lights are analogue and not digital so they are not exact on the dial placement.
I shot a wide horizontal image because at this focal length it's the only one that works. You don't want to be shooting someone full length and filling the frame at 24mm they will hate you.
If we look at a crop of this we can see it hold contrast pretty well. The edges of the dress are a little hazy but ok. Over all it holds up and will produce a usable image no problem. If I needed to shoot white seamless with a wide angle say for example a BTS shot this lens will work fine.
Crop form the Canon 24mm F2.8.
The next image is shot with the same lens but with the background lights cranked to full power.
Background lights full power. Loses contrast.
Canon EF 24mm F2.8. Background lights on full power. Not a good look.
As you can see even from the full shot we lose contrast. That light from the background is too much and is starting to wrap around the edges of the subject and dress. The 24mm F2.8 hold contrast pretty well to be fair but I would not be happy with this at all.
The next lens it the Canon 35mm F2. Oh man I love this lens, love it. If I was to able to only have one lens in my kit this would be it. I see the world in 35mm. Get a room Rick.
This lens is a 23 year old design and a nice fast prime to boot. Great for low light but let's see how it handles White Seamless.
5D Mark II, 1/125th, ISO 160, F8, Canon EF 35mm F2. Background lights back to good exposure.
As we take a closer look we can see that contrast holds well in the 35mm lens. The image below is a tighter crop of the one above. Nice seperation and good contrast.
Next we crank the background lights to full power to see how the Canon 35mm F2 handles the bad situation that is too much background light.
Background light cranked to full power. Back light hitting subjects back F11.
Even though this lens holds up you can still see a drop in contrast. Now we have a cleaner background but at the expense of other problems.
1. Reduced contrast.
2.Light from the background bleeding around on the edges of arms and cloths.
3. Brighter highlights on the legs and arms.
4. It's starting to influence the key light more as that background light bounces off the Octa.
I will take a little background clean up over a mess on the subject any day. You can see the affects on the close up below.
Crop of Canon 35mm with background lights at full power.
The next lens is the Canon EF 50mm F1.8 II, good old plastic fantastic and my least used lens in my bag. It's a good lens and a bargain even though it's design is 25 years old. The version 1 is great also.
Canon 5D Mark II, Canon EF 50mm F1.8 II, ISO 160, 1/125th, F8
Contrast holds OK with the set dialled in to my normal settings but we have other issues.
We have lost the floor because to get anything close to a full length shot with the right perspective with a 50mm lens on a Full Frame camera I have to shoot from a higher position. This shift in shooting height changes my perspective and angle to the boards on the floor and we lose some of the reflection of the background making the floor go darker meaning more post work.
If you are shooting an APS-C (crop) format camera then the 50mm will work for you because you will be further away from the subject and be able to fill the frame from a lower angle. I shot this format and the 50mm for years before moving to Full Frame.
If we crank the background lights to full power the 50mm starts to suffer.
Background lights on full power. Losing contrast.
This can further be seen with a closer crop.
Personally I would not want to use this lens for white seamless work.
The next lens in this test is the Canon EF 85mm F1.8 USM. Man this lens is great even though it's 24 years old, Canon are due to release an 85mm F1.4 L and to be honest i'm not all that interested because this 85mm is that sharp and good.
Let's see how it handles the white seamless set.

Canon 5D Mark II, Canon 85mm F1.8 USM, ISO 160, 1/125th, F8
The Canon 85mm F1.8 USM is my best portrait lens in the kit. It get's used for head-shots through to full length portraits and it holds contrast well on a white seamless set.
Did I say it's sharp?
If we crank he background to full power we wil lose contrast but it's fixable in post if needs be and it stays sharp.
Canon EF 85mm F1.8 USM with the background lights on full power.
If we show a crop of this lens with the background lights on full power we can see a loss of contrast but it's not quite as bad as earlier lenses like the 24mm F2.8 and 50mm F1.8 II.
Try not to crop at joints. Whoops.
The next lens is my most used one in the studio. Yup even though the 85 is my favourite portrait lens. It's the Canon 24-105 F4L IS - This is the version 1 of this lens. At 11 years old it's still a great lens and very versatile.
This copy came from a good friend after being repaired by Canon UK. I got it for a very good price. Thanks Mark.
Let's see how well it handles white seamless.
Canon 5D Mark II, Canon EF 24-105 F4 L IS, ISO 160, 1/125th, F8
As you can see the Canon EF 24-105 F4L IS holds contrast well but not quite as well as the 85. That said it does give me more compression and reach which is a good trade for studio white seamless work, especially when you have 5 people on a 9ft wide set.
Promo images for a local band Flagrant Angel
If we crank the background lights up to full power the Canon 24-105 F4L IS does suffer but this lens has great colour and contrast in any other situation. It's also sharp enough at F4.
Canon EF 24-105 F4L IS with background lights on full power.
A tighter crop of the above shot.
The last lens in this test is also my most expensive lens. The Canon EF 70-200 F2.8 L IS Version 1. It's a great lens that is 15 years old now but OMG it sucks at white seamless and back light.
My most expensive lens is the worst for this type of shooting style. Dam.
I expect it's down to the extra elements in the lens and older coatings. The Canon EF 70-200 F2.8 L IS II is apparently better but I don't have access to one for testing. Let's take a look at how bad this lens is at white seamless and back light.
Well that looks like crap and no the backgorund lights are not on full power yet.
It's a mess. Horrible.
Contrast dies and a further note on this lens is that it hunts for focus like crazy if you are shooting in to back light with say a window or natural light, i'm talking maddening hunting.
The lens is good as in it's sharp, I actually prefer it to the version 2 for skin tones and less sharpness in portraits but I can see it going soon and being replaced with the Canon 135 F2L prime lens. I need to get hands on with that 135.
Anyway let's crank those background lights to full power and see what a disaster this lens becomes.
Yuck!
It falls apart so badly that I don't need to bother showing the tighter crop. I will not use this lens for a back lit shot even at weddings if I can avoid it.
As you can see each lens handles this shooting scenario differently. My 35mm F2 is great as is my 85mm, the 24-105 sees a lot of use due to its compression (longer focal length) and is a far better option than going to the 70-200.
The only way you will get to know this stuff is by testing, be that with a mannequin or a model, friend or family member. Do it! Get to know your gear.
Their is no way in hell I will pull out the 70-200 for this work, in fact if my other lenses disappeared and I had a client in studio watching a tether I would rent or borrow a 24-105 for that job rather than let them see that mess.
This has been a long blog post so thanks for sticking with me.
If you would like to know how to get the best from a white seamless set-up I have a workshop coming up this month where I will demo the set-up and get you to set it up yourself so you can add this classic lighting style and look to your toolkit.
Thanks for reading.
Rick
The Craft.